Friday, 31 January 2020

AHPC X - So far, so good

Just a brief post today as I probably won't have any new painting projects finished for a few days. My progress in the Analogue Hobbies Painting Challenge is going well. Very well in fact. I'm comfortably ahead of where I need to be at this stage and well over halfway to my final target. I'm taking a week off mid-February for a short family vacation, but I'd factored that into my planning from the very beginning and have it well in hand. 


Thus far my points trajectory has been perfectly consistent and that is entirely down to the new Operations Room. Having a dedicated room just for painting has made a massive difference to my productivity in this Challenge. I still don't know how the highest flyers in the competition manage their output, but as I'm currently 8th in the rankings (out of 68 participants) I'm not complaining. The perfect trajectory may have a scheduled wobble in a couple of weeks but it's still shaping up to be my best Challenge ever.  

Thursday, 30 January 2020

Rousell the French Mercenary

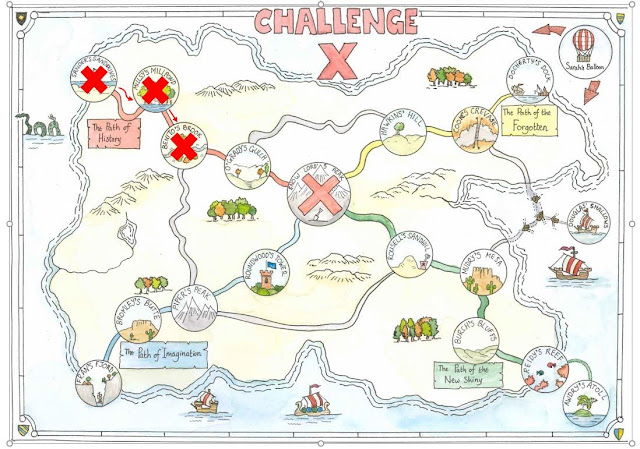
Finding models to use in what used to be called the bonus rounds, has always been a fun side challenge to the main event. It has often been difficult to find the right figures but I think some of my best creations have been inspired by this part of the competition. So when I saw the Challenge Island options I was very excited at all the possibilities open to explore. One thing I knew for certain was that whatever route I took, it had to pass through Rousell's Sandhill. How could I miss the opportunity to gently mock fellow Reject and good friend, Ray?


Of course, the tricksy bugger did give us a tough brief, picking a period of 1660 to 1699 in which to find a suitable floppy hatted figure. Thankfully I've played this game before, and called on all my experience (and mendacity) with previous bonus rounds to creatively shoehorn this figure into the appropriate time period. Of course, I had to identify it first. I suspected it was English Civil War but wasn't sure and so I put a request out to the wargaming community hivemind via Facebook. A response took less than half an hour and I had its origins identified. This is indeed for the English Civil War and is a Redoubt figure of a French mercenary officer.


It is 1660 and the English Civil War ended nearly a decade earlier but Captain Rousell has rarely been out of employment since then. Time may have moved on but this battered and ageing warrior is still reliving his younger days, still wearing his old gear and still talking about the glory days. Of course, he could never go anywhere without his closest companion, the stalwart battle badger 'Stuart'. These two could certainly tell a few tall tales about their exploits. Rousell is feeling his age now though; a lifetime on the march, sleeping in muddy camps and all the rigours of the campaign have made him old before his time. Despite losing an eye (and a few teeth) there is life in the old dog yet.


Ok, ok, I know I'm stretching the boundaries of the challenge (and credibility) a bit here but he's literally the only floppy hatted figure in my lead mountain, so cut me some slack! This was a wonderful model to paint with some amazingly detailed casting, all perfect and without any visible flash or mould lines to contend with. The only flaw was a blemish on the right cheek where his eye should be. After some thought, I cut off the blemish and turned the defect into a feature, in this case, an eye patch!


This model should earn me 40 points I think; 5 for the figure, another five for getting a Badger involved and the usual 30 for completing the location. Next stop, the Snow Lords Peak. I'm quivering with fearful anticipation at the terrible challenge that faces me next. Wish me luck, whatever it is!

Monday, 27 January 2020

Assorted Frostgrave Ruins

I have been trying to do a bit of terrain work every week but I got a bit behind and so today I'm trying to make up for it. This is a selection of mostly homemade buildings made from blue foam with one resin model embellished with additional rubble. 


The Liquified Chapel
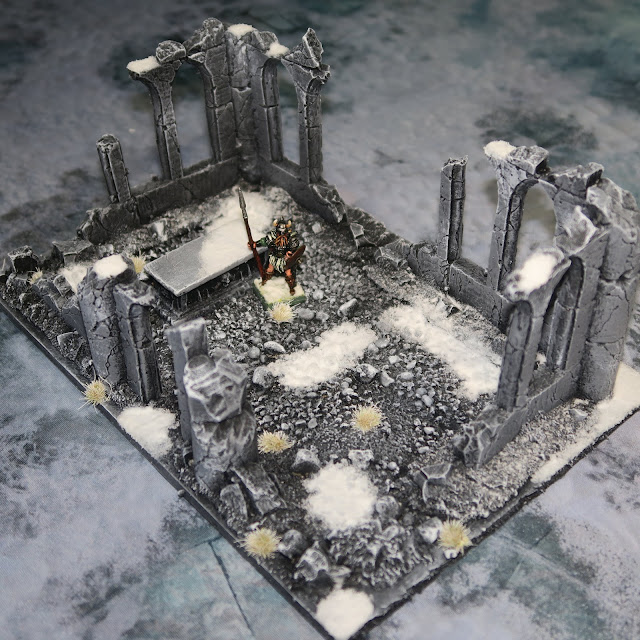
This resin building is made from several pieces that  I bought from Debris-of-War. As with my earlier resin models I decided to base them to form a single building that can be quickly plonked on the table and rearranged as needed from game to game. This model isn't of perfectly aligned walls, this time the building has clearly slumped and partially sunk in the ground with only the tops of window arches visible and walls at odd angles. This process is often seen at earthquake sites where loose ground 'liquifies' when shaken violently, causing buildings to literally sink as if built on mud. The resin sections make most of a circuit for the walls so I mixed up some rubble goo to fill in the blanks to suggest sections that have completely disintegrated. 


A Trio of Brick Buildings
These three buildings a smaller than most of the others I have built so far and were the first to make use of a new tool that I bought...a textured rolling pin. I got mine from a company called Greenstuffworld in Spain and on the whole I'm pretty pleased with it. The texture could be a little more pronounced but with sufficient pressure, it makes a good impression on foam and makes short work of creating brickwork. I imagine that these small brick buildings are lower status structures, (maybe artisan buildings) as opposed to the stone-built more monumental buildings I have done so far. They also add a bit of colour to what has until now been a largely stone grey and frosty white landscape.


Corner Arched Building
This was an excuse to have a go at making an archway. This time I have opted to model a stone building made in larger stone blocks rather than brick. I have liked to imagine a use for all the buildings I have done so far but, to be honest, I don't know what this could be. Not that having a backstory for a terrain item is necessary of course! 


The Rectory House
This is a larger building, formed essentially out of two corner sections with the hint of internal walls. For speed I chose not to model brings or stones for the whole building, merely hinting at it in places and treating the surface as if it were plastered. This makes me think this is more of a residence than a civic building. 


Incidentally, I have decided the overall look of my buildings is a little too dark and needed some extra attention. I like the black undercoat and high contrast shading I have used to give the terrain a frosty look, but I think all my buildings need some extra snow. I've decided that when I finish all of them I'm going to go back and add a dusting of snow to everything. I'll make up some dilute PVA in a spray bottle, apply it to all the models and 'dust' from a few feet above with the Woodland Scenics snow I have been using. If I do this at the end of the process I can ensure that I achieve a consistent effect across all my buildings, helping to bring the collection together as a coherent set of terrain.


Sizes and Scoring - None of these neatly fits into a terrain cube as defined in the Challenge rules, so I have added up the overall dimensions of all the buildings and divided by 216 cubic inches, equalling a little over four terrain cube, so 80 points. ­

Liquified Chapel - 2.5"x9.5"x7" = 166.5 in³
Large Brick Building - 3"x8"x6.5" = 156.0 in³
Small Brick Building 1 - 3"x5.5"x4.5" = 74.0 in³
Small Brick Building 2 - 3"x5.5"x4" = 66.0 in³
Corner Arched Building - 3"x8"x6.5" = 156.0 in³
Rectory House - 5"x8"x6.5" = 260.0 in³
Total 878.5 in³ divided by 216 = 4.067 terrain cubes. 

I think this is enough of the 'simple' buildings for the time being. I have quite a bit of terrain now, enough certainly to cover my small table for a game. I have a couple of more delicate resin models to put together and a few stand-alone items and scatter terrain to work on next. I'm also planning on making a couple of more complex buildings from foam but these will take several weeks just to construct let alone prime and paint, so expect to see these towards the end of the challenge. A very wise man (MilesR in fact) suggested the way to notch up the points was via terrain, and he wasn't wrong! 

Friday, 24 January 2020

Classical Indian Heavy Chariots


There is evidence that Chariots had been in use in India for centuries before the arrival of Alexanders Greeks. Epic stories tell of the great hero's going into battle in chariots and for a long period, it was the elite arm of Indian armies. However, by the fourth century BC, they were being superseded by the Elephant and by the time of the Battle of the Hydaspes leaders such as King Poros went into battle astride these massive beasts of war. The Chariot was still an important and prestigious arm of the military but its heyday was over.


Much of the visual information I have gathered suggests that Indian War Chariots were highly painted vehicles, many with umbrellas or canopies over the occupants (probably removed during battle). Chariots came in a wide variety of sizes, from single man vehicles through to massive constructions supposedly capable of carrying six occupants. I have chosen the four-man variety and all are painted in bright colours.


Constructed to be light but strong they were mostly leather over a timber framework. They are recorded as being highly decorated with bells, animal skins and flags. The wheels were usually fairly small with up to sixteen spokes and had a metal (probably iron) tyre. The chariots, even the larger ones, had a single pole and usually, only the inner pair of horses were yoked. The outer horses were connected by side traces but these would have been needed to carry six crew and all their fighting equipment. One description of Poros' chariots says they had six crew but this may be a miscounting, including escorting infantry with a typical crew of four. These models have two crew armed with bows while the 'drivers' have Javelins. 


I have been looking forward to painting these for a while but decided early on that I would treat these and the Elephants that are coming next as my reward for getting through the 'drudgery' on the infantry and cavalry. I use that word advisedly because once I get past the initial inertia at the start of a project, I enjoy painting all of it, including the less glamorous units! These chariots, however, could never be described as unglamorous. 


There are six units here which include 12 Chariots, 48 crew and 48 horses which should earn me 60 points. I've also done a couple of command chariots, based individually which should net a further ten points. With the Chariots complete its now time for me to focus on the Elephants and I expect these to be just as spectacular and an even greater riot of colour. 

Tuesday, 21 January 2020

Victorian Photographers

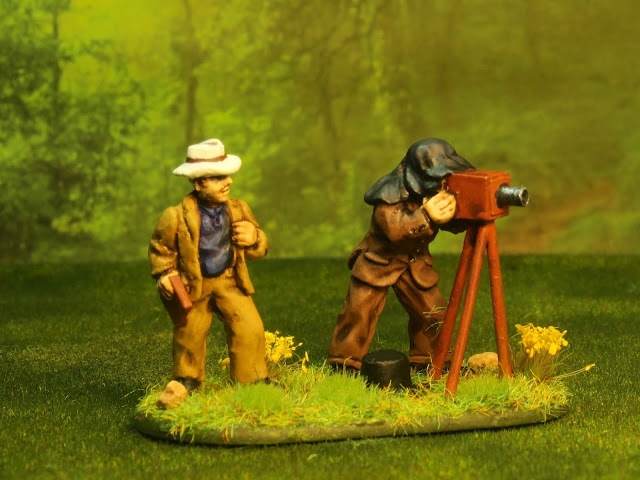
As I cut my way through the jungle on Challenge Island I hear a noise up ahead. I hear muffled voices and chillingly the only word I can make out is "...cheese...". What manner of terrible arcane ritual is taking place this far into the forest? Despite my fears, my curiosity gets the better of me and I creep silently through the underbrush. As I get closer I can hear the occasional mechanical clicking noise. With rising trepidation, I part the final fronds of the bush in front of me and reveal.....two victorian photographers! One stands ready with fresh photographic plates in his hands while his companion peaks through the viewfinder.


The figures are 28mm foot to eye. The camera is cast as part of the photographer but the tripod is assembled separately and was a proper b----r to stick in place. 


This is my fourth location on the island and in the distance, I can see the mountain of the Snow Lord himself. But first I need to see a man about a badger!


Monday, 20 January 2020

My Analogue Hobbies Campaign

A little over four weeks have now passed in the Analogue Hobbies Painting Challenge and I thought a little review of my progress would be in order. For me, the Challenge begins way before the Dec 21st start date, usually getting underway just a few days after the last challenge has ended. I'll start thinking about what big projects I want to get done and begin the long process of restocking my supplies at the next show I attend (usually Salute) and as I get closer to December the shopping reaches a glorious crescendo. The final month of preparation usually also includes a lot of construction and priming of models so I can hit the ground running, and this year I have been off to a fantastic start.

My personal target for Challenge Ten is to beat my previous personal best of 1307 points. I had a reasonably clear idea of what projects I wanted to complete but I went into the competition knowing that I probably didn't have enough points worth of figures waiting in the wings. The opening four weeks have seen me make excellent progress towards my target, indeed I am ahead of where I need to be at this point. As I have progressed I have identified additional projects and my estimated final points total is now within a gnats whisker of my aim point.


The chart shows that I am significantly above my week-to-date target but this is a bit deceptive as I am taking a few days off in February (for a short holiday) so I need a bit of headroom to cover that interlude. I also have several ideas for large Frostgrave buildings that I want to build from foam and these take a long time to construct and will naturally take time away from painting projects. So I expect the weekly points totals will reduce as we near the end of the Challenge and again, the headroom I have now will help significantly if I am to keep to my target. Overall however I am very happy with how things are going and as I have found in previous years the challenge is the perfect antidote to painting prevarication and inertia! 

Friday, 17 January 2020

Defiant RAF Pilot

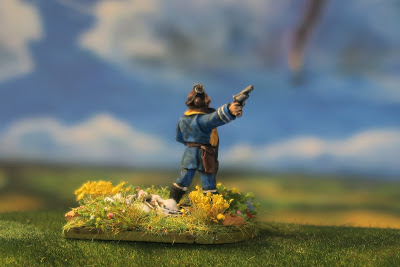
My progress in the Painting Challenge continues to move forward at a pace and my latest entry is on my journey around Challenge Island. I'm now taken at Benito's Brook with my heroic RAF pilot definitely shooting at the enemy after being shot down himself. The brief for this location was "A figure or vignette related to some brave feat of arms, almost hopeless against impossible odds." and for me, nothing personifies that as clearly as the Battle of Britain.


This turning point moment has been much mythologised and has become embedded in British culture as representative of the bulldog spirit and all that. But I think the reality of that epic clash of airpower is much more impressive. Not only were our skies being defended by incredibly brave pilots but down on the ground, Britain's air defence network was probably the best in the world at that point. Despite being outnumbered, and at times overwhelmed, we were able to grind down the Luftwaffe and not only inflict more losses on the enemy, but more crucially, destroy their will to continue the fight, buying the country a much-needed reprieve from potential invasion.


I have a mental image of this chap calmly lighting his pipe while drifting down to the ground, completely unphased by the loss of his aerial steed. He lands, takes another puff of his pipe, pulls out his service revolver and starts plugging away and any Luftwaffe pilot foolish enough to come within range! The figure is from Warlord and try as I might I can't remember where I got him from. I expect he was another "ooo shiny" moment; one of many that have resulted in my Lead Mountain growing year after year!


The model came with a shaped base but I felt it wasn't big enough so I made a slightly bigger one from 2mm MDF that I think looks better proportioned. My next step on Challenge Island is Pipers Peak and a couple of Victorians. 


Thursday, 16 January 2020

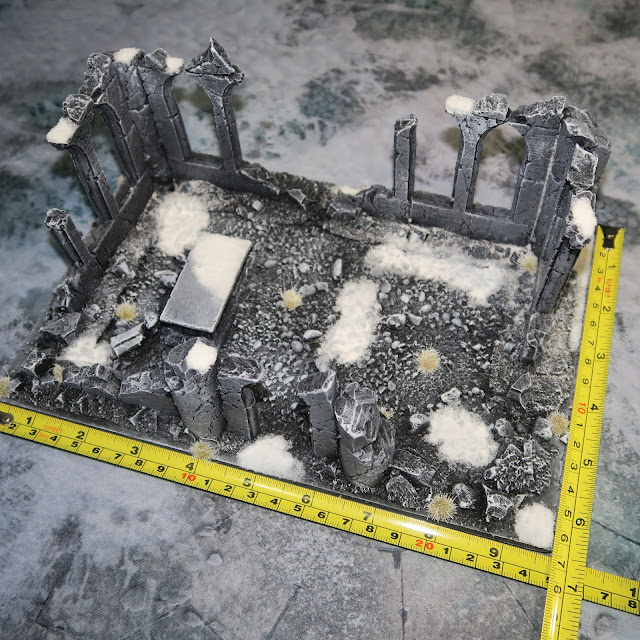
The Collapsed Cloister

Another day and another ruined building from my growing Frostgrave collection. This one is made from an assembly of resin terrain pieces from a Polish company called Spellcrow. I stumbled upon this company back in November while I was looking for resin terrain and I was immediately impressed with the look of some of their offerings and put together order the same day. What followed was an epic saga and (probably) an epic journey that ended up with purchasing more from this little company.


So the saga... I placed my order early in November and sat back awaiting delivery. I was expecting a couple of week wait but time slipped on and eventually, I emailed the company for a tracking number. This showed that the parcel had left Poland and was awaiting receipt from Royal Mail for the second leg of its journey. I waited a few more days but Royal Mail continued to show the parcel as having not left the country of origin. After a flurry of emails with Spellcrow, they agreed the parcel must be lost in transit and would send me a replacement. This turned up less than a week later and I was very happy, both with the quality of the models and the excellent customer service. Fast forward nearly five weeks and a mystery parcel arrived on my doorstep... my original order! Either it had been circling the North Sea for a month or (much more likely) Royal Mail had lost it in their system and only rediscovered it after the Christmas rush was over.


I was so happy with the quality of the resin models I had received in December (and the freebies they had included with my order) that I decided to keep the duplicate order. I hasten to add I emailed Spellcrow and have now paid for the duplicate items as I don't see why they should be out of pocket because our postal service is incompetent! In fact, I'm also in the process of putting together another order from their excellent catalogue. Quality products and good customer service should always be rewarded.


The dimensions of this building are 9"x6"x4" so the equivalent of one terrain box which should add another 20 points to my tally. I have yet more terrain for later in the challenge including more resin building ruins from Spellcrow, so my Frostgrave (mis)adventure is not over yet!

Tuesday, 14 January 2020

Classical Indian Cavalry

After several terrain entries, I decided it was time for me to stop procrastinating and make some progress with my 6mm Classical Indian army. I have already submitted some archers and javelinmen which make up the bulk of my infantry and now it was time to get started on some of the more colourful units in the army. First off the production line are the Cavalry. From what I have read Indian Cavalry were fairly low-status troops and certainly didn't represent the wealthy elite as in many European armies of the time. However, that doesn't mean they weren't colourful and I have really enjoyed painting these (once I got started!). Once again I have referred back to the work of Duncan Head but I have also been hunting down lots of visual reference material from the inter-web and my much more modest book collection.


The Indian Cavalry at the Battle of the Hydaspes were completely outmatched by the Macedonians facing them. For a start, they wore little or no armour protection apart from their shields. The Cavalry were also outnumbered, especially when Alexanders feint attack on the Indian flank drew off some of the Chariots that were positioned with the Cavalry. The soft ground of the battlefield, made worse by heavy rains, would have impeded both armies but the effectiveness of the Chariots would have been severely impaired by the mud and made the cavalry clash all the more significant to the eventual outcome of the battle. 


As with all my 6mm projects I start with a brown primer. I find that this works well because it fills the gaps between equipment and clothing while remaining light enough that the details of the figure can be seen when painting. Black undercoats at this scale just seem to suck up all the ambient light and it feels like your trying to paint detail on a shadow! I then work my way through all the elements of the figure and block paint as neatly as possible. I'll usually start with the face, arms and legs, them do the armour or cloths and then move on to weapons and lastly shields. The neater you do this stage the better the final unit will look. Once I have block painted the various elements of the figures I use a dark brown ink wash to add the required shading (I use a Winsor and Newton calligraphy ink called Peat Brown). Really that's all there is to it, 6mm really is that easy.


There are four units of Cavalry here, each with 18 figures per base (72 in total). The only question that remains is what to work on next? I'm tempted by the Elephants but I think I may leave these till last. If I'm honest, I'm painting this army purely because of the vast number of Elephants, so I think I'll use these as my reward for working through everything else. So that means my next project will be the Chariots. I have already been through the nightmare that was assembly (VERY fiddly when they are 6mm!!), so I can just focus on the fun of painting them. 

Saturday, 11 January 2020

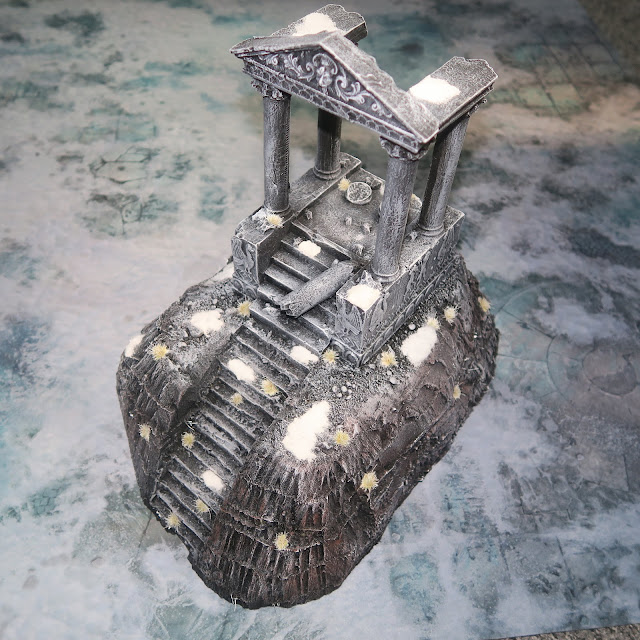
The Temple Rock

Today's entry is another resin building, this time a Temple, but its origin isn't from a wargaming company. This ruined temple is actually a decorative item for an aquarium that I saw on eBay. It came prepainted but that didn't fit the colour scheme of my other Frostgrave terrain so I reprimed it with black acrylic before starting from scratch.


I want some terrain on my table with a bit of elevation so I decided to mount the temple on a tall rocky outcrop made from offcuts of high-density foam insulation. In fact, the foam I used is the remains from my Isandlwana Project last year that have lurked in a cupboard since then. I almost threw it away but I'm glad I didn't because it was just the right size for this model. I made a proper mess carving it into the right shape, and even more mess cutting the stairs into it so that they joined up with those on the temple itself. By the time I was finished pretty much my whole room was covered in foams flakes and dust... Luckily I had the foresight to wear a mask, but I need to buy myself a little handheld dustbuster/vacuum for my hobby room! 


The finished model will make a nice big centrepiece to a game and will give the players something to fight over, especially if I place some treasure here. Indeed the model comes with a collapsed wall in the back of the plinth and I have incorporated this with the hill to represent an exposed crypt that may contain treasure or the lair of a monster.


The temple dimensions are about 1 terrain box (8.5"x5"x6" or 255in³). The base is by necessity wider but is also an odd shape (12"x9"x4.5" with sloped edges) which I estimate equates to about 2 terrain boxes, so this piece should net me a whopping 60 points. 

Thursday, 9 January 2020

Crumbling Inn

My latest entry to the Painting Challenge is another one of my bluefoam scratch-built model ruins for Forstgrave. I do have some more resin models to work on but these still need to be cleaned and primed so I decided to work on one of my foam models first. I'm doing buildings in several styles, some are monumental buildings 'made' of great stone blocks while other buildings are brick and plaster. This is one of the latter and represents a crumbling Inn or coaching house.


I went to town on this building throwing all my newly learned foam modelling techniques at it. So we have brickwork exposed under the plaster, window ledges and lintels, cracked plasterwork and even the remains of a wooden floor and internal walls. I'm hoping to make more buildings like this later in the challenge, with a view to providing a variety of modular terrain and multiple levels for players to exploit. I have made some smaller buildings which will be seen later in the challenge and will be exploring various techniques as I learn them. Incidentally, I have found YouTube an invaluable resource for how-to videos and tutorials and would definitely recommend this for anyone tackling this material for the first time. 


Aside from using the bluefoam for the walls I also used thinner foam board for details like the window ledges and coffee sticks to make the wooden floors. As before, the ground is covered in a scattering of tallus and hand made bricks to represent the collapsed roof. I did consider building up the floor with a depth of collapsed building but decided I needed relatively flat floors for models to be placed on. 


The whole building stands a little over 4.5" tall and has a 'footprint' of 6" by 9" giving an internal volume 243in³ so a little over one terrain box.